

🎁 How to apply the TRX Training Discount Code

Your TRX Suspension Trainer needs an overhead anchor point 7 to 9 feet (2.1–2.7 m) off the ground, strong enough to hold a swinging bodyweight load, and about 8 feet long by 6 feet wide (2.4 × 1.8 m) of clear floor space in front of it. There are three ways to get that anchor point: hang it over a door, loop it around something overhead like a beam, bar, tree or rack, or bolt a mount into a load-bearing wall or ceiling. This guide walks through all of them, step by step, and tells you when each one is a bad idea.
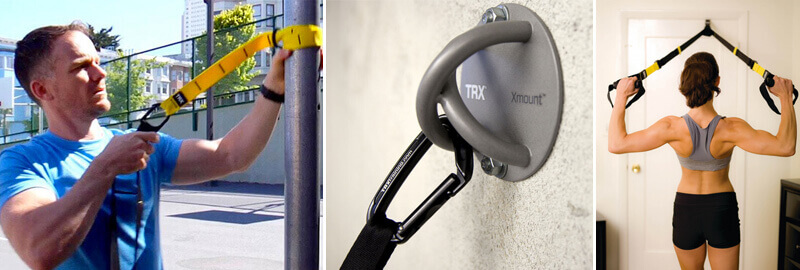
Three ways to get an anchor point: over a door, around something overhead, or bolted into the structure.
Who this guide is for
This is for you if you just unboxed a Suspension Trainer and you are standing in your living room wondering where it goes — or if you already train and want to check that your setup is actually safe. It is not a buying guide. Still choosing a model? Read the TRX Suspension Trainer comparison first, or start with what TRX actually is.
One thing to settle before you hang anything: make sure your straps are genuine. Counterfeits use inferior webbing and stitching, and the failure point is usually the strap, not the anchor. Here is how to tell a real TRX from a fake.
- Standing still in the straps, your anchor holds a share of your bodyweight set by your body angle. The more you lean back, the more it holds.
- The moment you move, that changes. Every rep adds acceleration and deceleration, and the load rises above your static weight.
- Side-to-side movement adds a sideways pull. An anchor fine with a straight downward hang is not automatically fine with a strap yanking it at an angle.
Why it works: this is the Vector Resistance Principle in reverse. You change difficulty by changing your body angle — and the same angle change moves load onto or off the anchor point. So the rule is not can this hold my weight. The rule is can this hold me moving fast, in every direction, several hundred times.
How much space does a TRX need?
Less than people expect, but more than a hallway corner.
| Anchor point height | 7 to 9 feet (2.1–2.7 m) off the ground |
| Where the handles end up | Bottom of the anchor around 6 feet (1.8 m) from the floor |
| Floor space | At least 8 feet long by 6 feet wide (2.4 × 1.8 m) |
| Ceiling over 9 feet (2.7 m)? | Add a TRX Xtender to bring the attachment point down |
The 8 by 6 rectangle is what TRX recommends, and it is honest. You need length in front for pressing and rowing, and width for lunges, pikes and anything rotational.
Quick test: stand under the anchor, hold the handles, and walk your feet forward until your body is at 45 degrees. If your heels hit the couch, you do not have enough room yet.
Which anchor fits your space?
| Your situation | Best setup | Drilling? |
|---|---|---|
| Renting, apartment, no marks allowed | Door anchor or door hinge anchor | No |
| Traveling, hotel rooms | Door anchor | No |
| Exposed beam, pull-up bar, joist | Suspension anchor looped around it | No |
| Squat rack or power rack at home | Suspension anchor over the top bar | No |
| Outdoors — tree, pole, playground | Suspension anchor, plus Xtender for thick trunks | No |
| Dedicated home gym, garage, basement | X-Mount bolted into a stud or joist | Yes |
| Living room you do not want to look like a gym | Invizi-Mount, which doubles as a picture hanger | Yes |
Disclosure: This post contains affiliate links. If you buy through them, I may earn a commission at no extra cost to you — and you get 15% off with my code TRX15LUKAS. I only recommend gear I actually use.
Most people end up with two anchors, not one: a door anchor in the bag for travel, and something permanent at home. If you are buying accessories anyway, grab the 15% discount code before you check out.
1. Door anchor — the fastest setup
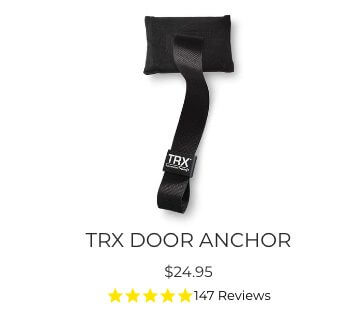
A small foam-padded block on a nylon strap, about 5 by 3 inches (13 × 8 cm). It ships with the Home2, Pro4 and Tactical systems, so you probably already have one.
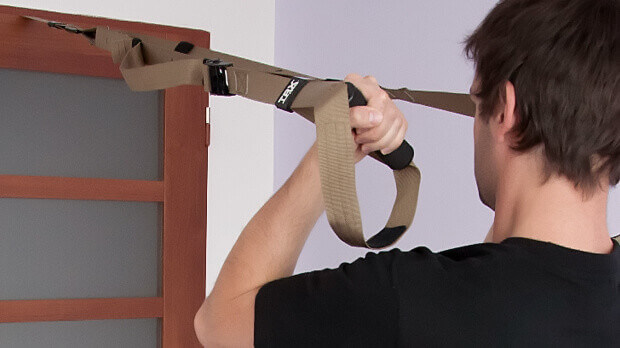
The padded block sits on the far side, so every rep pulls the door tighter into its frame rather than open.
How to set it up
- Pick the right door. Solid, in a frame that is properly fixed to the wall. It has to open away from you while you train.
- Open the door and drape the anchor over the top edge, roughly in the middle.
- Padded side goes on the far side — the side you will not be training on. The loop hangs down toward you.
- Close the door firmly so the anchor is wedged between door and frame. Lock it if you can.
- Clip your carabiner into the loop and hang the straps.
- Test before you train. Grab both handles, lean back gradually, and add weight until you are at full body angle. Watch the door, not the straps.
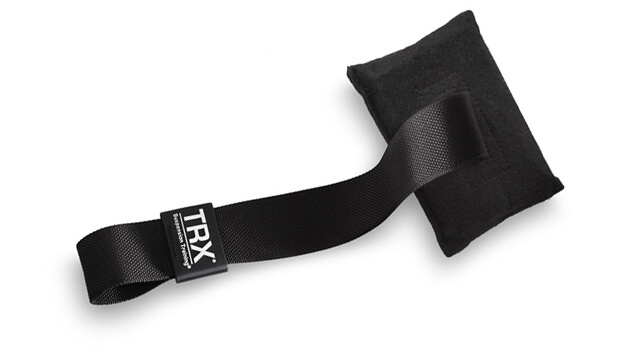
A door anchor is only as strong as the door it hangs on, so load-test it at the start of every session.
DO NOT use a door anchor if
- ❌ The door opens toward you. You would be pulling it open with every rep, straight into your face. This is the single most dangerous mistake on this page.
- ❌ The door is hollow-core, folding, sliding, or glass, or the frame is loose and the hinges rattle.
- ❌ Someone else can open it from the other side. Hang a note on the far handle.
- ❌ You are doing lateral or rotational work that pulls sideways against the door edge.
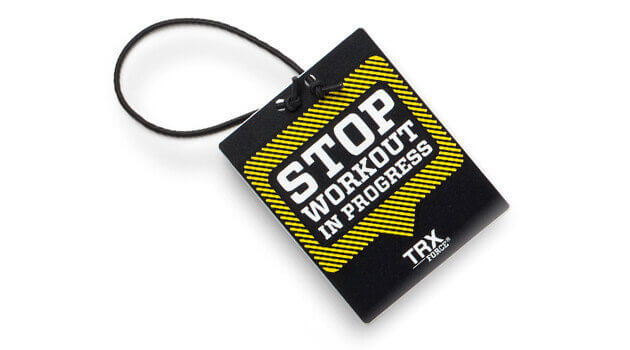
For optimal safety hang up a sign with the inscription “Workout in Progress!” on the other side of the door.
Rule: a door anchor is only as safe as the door. If the door moves when you lean, stop and find another anchor point. NEVER trust a door you have not load-tested that same session.
2. Door hinge anchor — permanent, without holes
This one solves the renter problem elegantly. You pop the pin out of an existing door hinge, drop the anchor in its place, and you have a fixed steel attachment point that leaves zero marks. It fits most interior doors with 3½ inch or 4½ inch (8.9 or 11.4 cm) hinge pins.
How to set it up
- Pick your hinge. TRX designed it for the middle hinge of a standard door, and that is the position they specify for a Rip Trainer. For a Suspension Trainer, going higher gives you more headroom — just check the hinge is sound before you commit.
- Tap the existing hinge pin upward and out. A screwdriver and a light tap does it.
- Slide the anchor into the empty knuckle so the loop faces out into the room.
- Check the door still swings and closes normally.
- Clip in and load-test the same way as the door anchor.
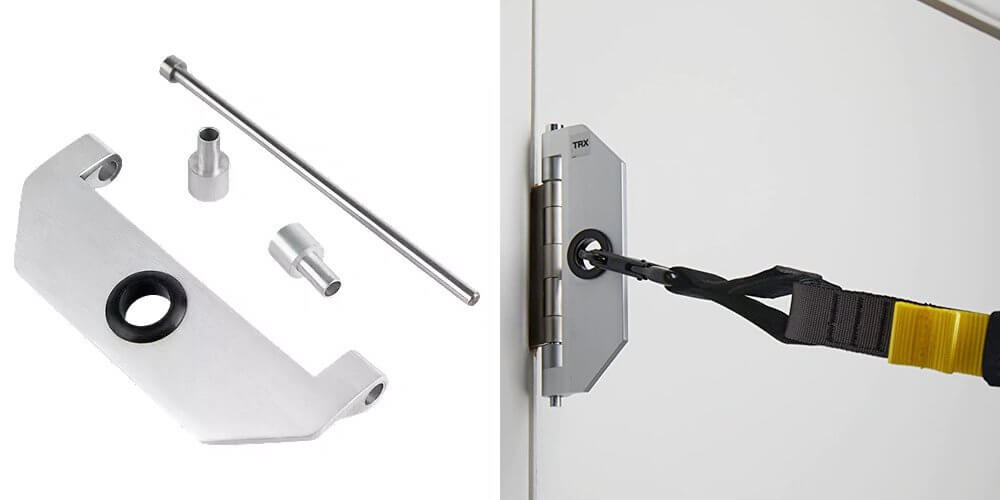
TRX specifies the middle hinge; for a Suspension Trainer a higher sound hinge buys you more headroom.
DO NOT use a hinge anchor if
- ❌ It is an exterior door. TRX rates this for interior doors only.
- ❌ Your hinge pins are not 3½ or 4½ inches, or the hinge screws are pulling out of the frame.
- ❌ You want a wide arc — you are anchored to one side of a doorway, not overhead center.
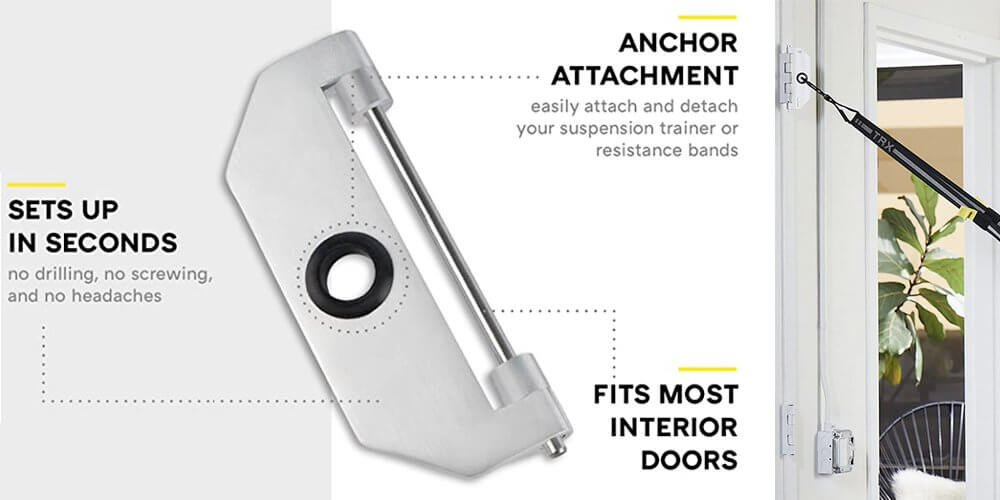
Very stable. Much better than threading a strap through the door jamb. Goes well with a 2 1/2 inch carabiner.
3. Beam, pull-up bar or joist — the suspension anchor
The suspension anchor is a 38 inch (97 cm) adjustable strap with a loop at each end. It wraps around anything overhead and adjusts to anchor heights of 7 to 9 feet (2.1–2.7 m). It ships with the Home2, Pro4 and Tactical systems.
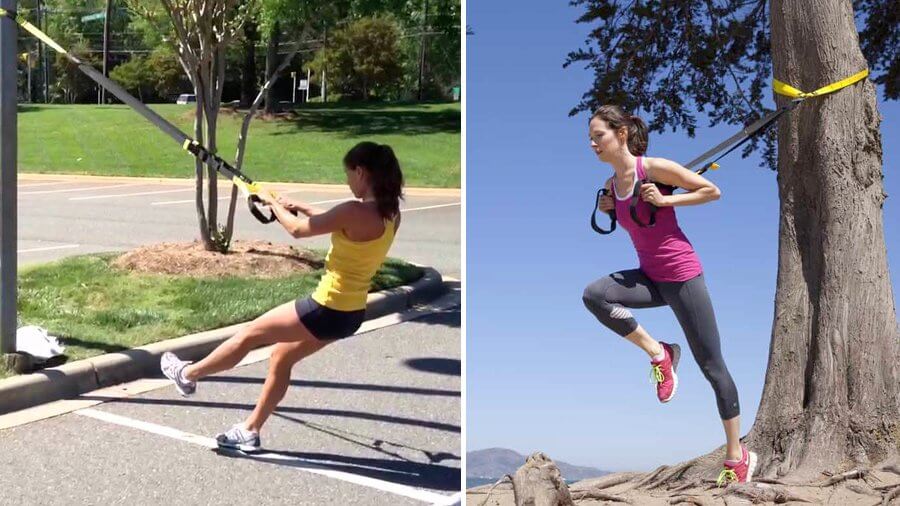
The same strap covers a beam, a pull-up bar, a rack crossbar and a tree, because it cinches down on itself.
How to set it up
- Throw the strap over the beam, bar or joist.
- Feed one end through the other and pull it snug so it cinches down on itself.
- Adjust the length so the bottom loop sits around 6 feet (1.8 m) from the floor. That is the height where the standard strap lengths work out correctly.
- Clip the Suspension Trainer carabiner into the bottom loop.
- Load-test with a gradual lean, then a single slow row.
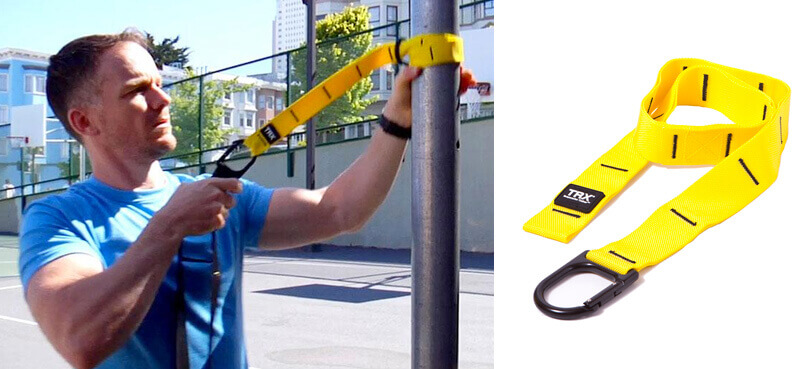
Clip the carabiner into the bottom loop — never run bare webbing over steel, because that is where abrasion starts.
This is also the setup for a squat rack or power rack. Loop the anchor over the top crossbar, not over a J-cup or a safety arm. Make sure the rack is bolted down or heavy enough not to tip — a lean-back row pulls the rack toward you, and a light rack will walk across the floor.
DO NOT loop around
- ❌ Anything with a sharp edge. Steel angle iron, an unfinished joist corner, a rusty bracket. The webbing abrades faster than you think.
- ❌ A suspended ceiling grid or a decorative false beam. Neither carries load.
- ❌ Pipes. Sprinkler lines, water lines and conduit are not structural.
- ❌ A pull-up bar that is pressure-mounted in a doorway. Those are rated for a vertical hang, not an angled pull.
4. Outdoors — trees, poles and playgrounds
Same anchor, different judgment call. A park is the best free gym you have, and this is where the whole TRX library gets fun again.
How to set it up
- Find a branch or bar 7 to 9 feet up. On a tree, pick a live branch at least as thick as your forearm, close to the trunk where it is strongest.
- Wrap the suspension anchor and cinch it.
- If the anchor point is higher than 9 feet (2.7 m) or too thick to wrap, add a TRX Xtender — a 37 inch (94 cm) extension strap. TRX recommends one for anchor points under 25 inches (64 cm) in circumference, two or more joined for anything bigger.
- Check the ground. Level, dry, no roots under your feet.
- Load-test hard before your first rep. Outdoor anchors are the ones you know least about.
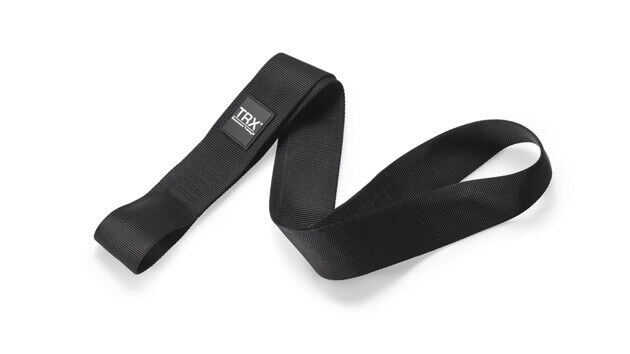
The Xtender adds 37 inches (94 cm) of reach — join two when a trunk is too thick for a single strap.
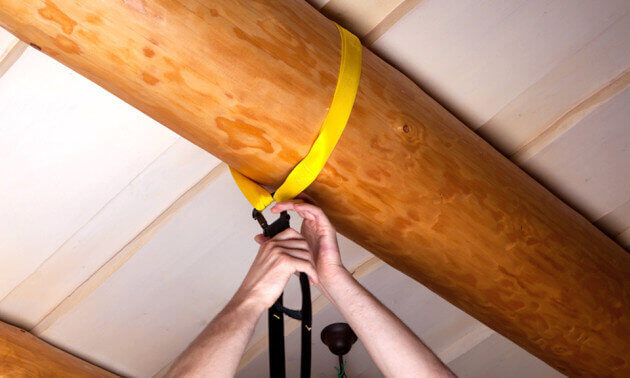
Wrap close to the trunk, where a branch is strongest, and cinch the strap fully before you load it.
DO NOT anchor outdoors to
- ❌ Dead branches. If the bark is peeling or it has no leaves in summer, walk away.
- ❌ Chain-link fence rails or anything that bends when you pull it.
- ❌ Swing set frames that are staked rather than concreted in, or basketball hoops that rock in the socket.
- ❌ Anything over concrete or asphalt if you can help it — if it does let go, the landing matters.
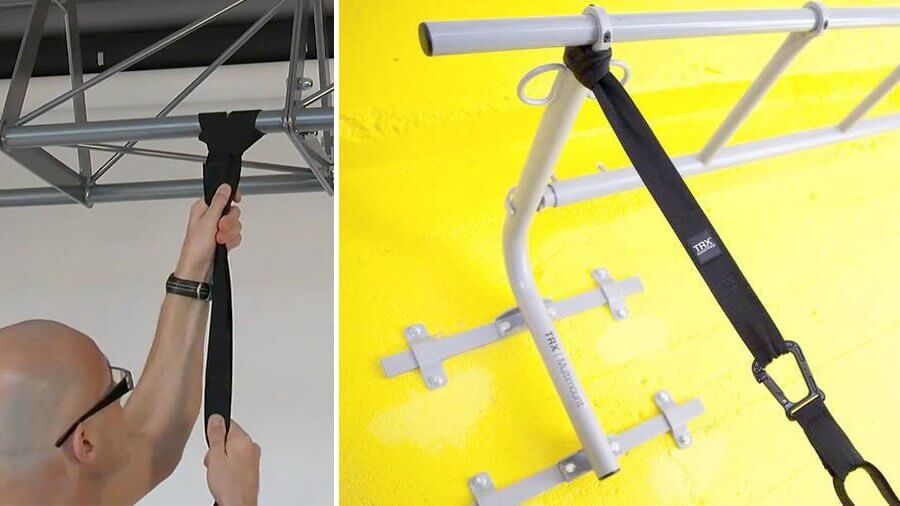
TRX recommends one Xtender for anchor points under 25 inches (64 cm) around, and two joined for anything thicker.
Trainer tip: the Pro4, Digi Camo Pro4 and Tactical systems already include an Xtender. The Home2 does not. If your training is mostly outdoors, that difference is worth checking in the model comparison before you buy.
5. X-Mount — the permanent bolted anchor
If you have a dedicated space, this is the setup you stop thinking about. The X-Mount is powder-coated steel, roughly 6 by 4.75 by 2.5 inches (15 × 12 × 6 cm), and comes in gray or white. Its X shape takes more than one strap, which matters if you train with a partner or also own a Rip Trainer.
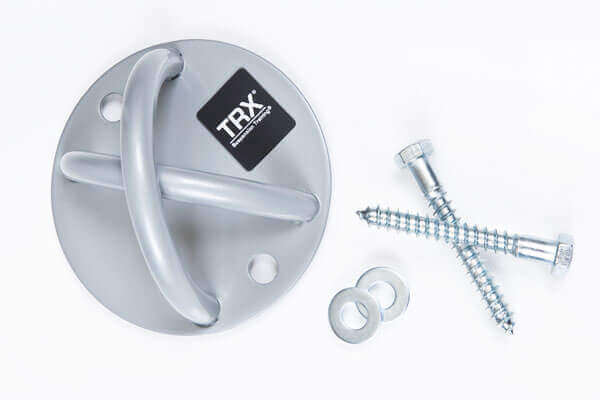
Bolted into a joist, the X-Mount turns setup into a two-second clip-in — which is why it gets used more often.
How to install it
- Find a load-bearing stud or ceiling joist. Use a stud finder, then confirm with a small pilot hole. Drywall alone will NOT hold you.
- Mark both bolt holes so the mount sits square, centered on the beam, and drill pilot holes sized for the supplied lag bolts.
- Bolt it down tight. The trimmed backing sits flush and reduces scratching.
- Clip your carabiner into the mount — and this is the part people get wrong. Use the anchor carabiner that came with your Suspension Trainer. Do not force the strap webbing over the bare steel.
- Hang, then load-test with a slow progressive lean before your first real rep.
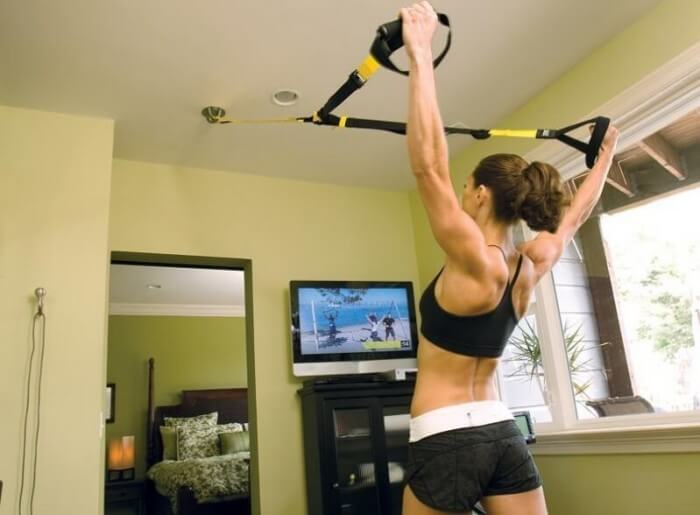
Two lag bolts into a stud or joist is the whole job — find the timber first, because drywall will not hold you.
 Follow the instructions in the box; there is also a copy of the X-Mount installation instructions as a PDF here.
Ceiling or wall?
Ceiling gives you more. It lets the straps swing freely, which you need for pendulum work, rotational moves and anything where you travel side to side. A wall mount is fine for pressing, rowing and most lower-body work, but it limits your arc.
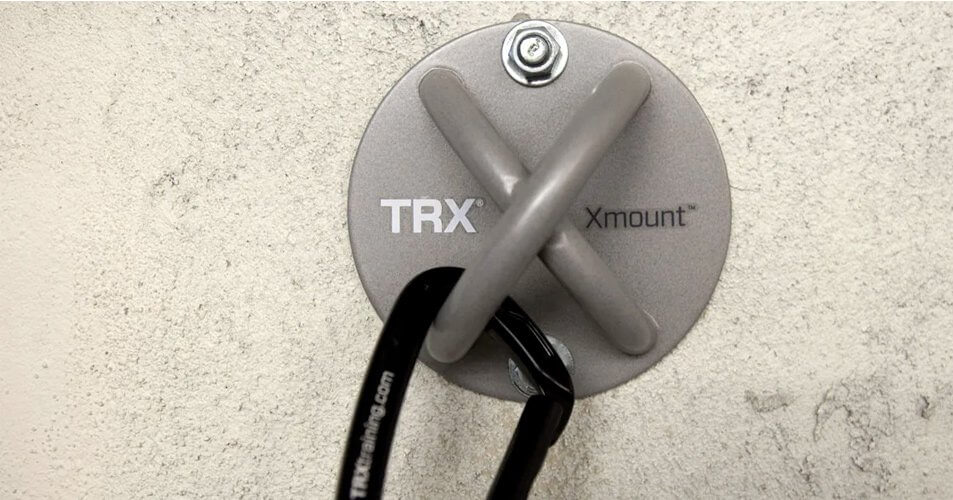
Easy to install and really holds up well. The anchor is a great addition to your home gym.
DO NOT drill into
- ❌ Drywall or plasterboard on its own. No toggle bolt or plastic anchor is a substitute for a joist.
- ❌ A suspended or drop ceiling.
- ❌ Hollow brick or crumbling old mortar without masonry anchors rated for the job.
- ❌ Any wall you have not checked for wiring or pipes first.
- ❌ Your landlord’s wall, unless you enjoy paying for it later.
One honest note: the bolts in the box are wood lag bolts, meant for timber studs and joists. Mounting into concrete or masonry means buying the right anchors for that material separately.
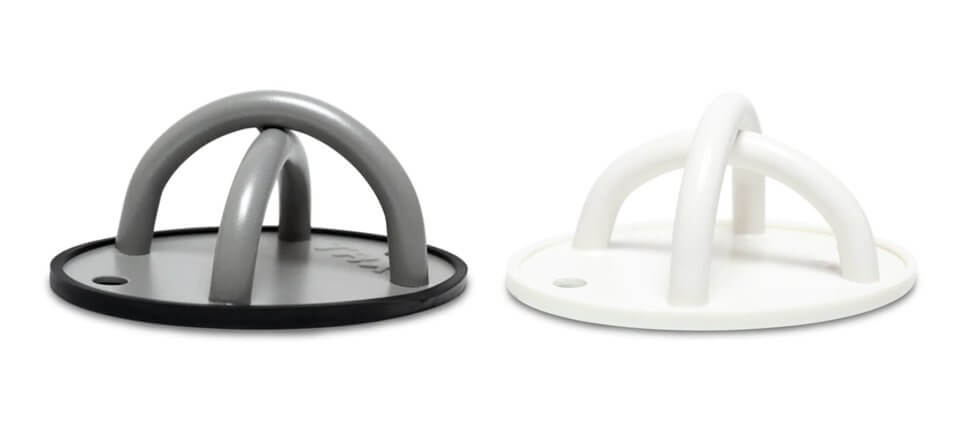
White disappears into a painted ceiling; grey hides better against exposed timber, brick or concrete.
6. Invizi-Mount — the one that hides
The newest option, and it solves a real problem: you want a permanent anchor, but you do not want your living room to look like a gym. The Invizi-Mount is a slim steel plate that installs like picture-hanging hardware. When you finish training, you hang a photo over it.
It is also the only TRX anchor with a published load rating: it anchors to load-bearing walls and holds up to 350 lbs (159 kg). That is the number to quote if anyone asks what a TRX anchor holds — and it is worth knowing the other mounts simply do not publish one.
DO NOT use it if you cannot hit a load-bearing wall stud, if you want a ceiling mount, or if you need more than one strap connection point.
Drill or not drill? An honest comparison
| No-drill setups | Drilled mounts | |
|---|---|---|
| Setup time | Seconds, every session | Thirty minutes once |
| Leaves marks | No | Yes, two bolt holes |
| Travels with you | Yes | No |
| Freedom of movement | Limited by the door or object | Full, especially from a ceiling |
| Multiple straps at once | No | Yes, with the X-Mount |
| What can go wrong | Door opens, object shifts, strap slips | You missed the stud |
| Best for | Renters, travelers, outdoor training | Homeowners, garage and basement gyms |
If you rent, you have three good options and none of them involve a drill: door anchor, door hinge anchor, or a suspension anchor over an existing bar or rack. You are not missing out. The exercises are identical — from a gentle lower back routine to a full-body session.
How to check your anchor point holds
You will not find a load rating stamped on your door frame or your ceiling joist. So you test instead. Every time, and it takes about twenty seconds.
- Look at the anchor point. Cracks, movement, rust, splintering or loose fasteners? Stop there.
- Run a finger along the contact surface to check for sharp edges.
- Hang your bodyweight statically. Both handles, feet on the floor, lean back to about 45 degrees. Hold five seconds.
- Add movement. One slow row, then one faster row. Creaking, ticking or a shifting sound means stop.
- Check the strap position. If the anchor crept along the beam or slid sideways, reset it.
Safety rule that has never let me down: test with your feet on the ground and your bodyweight partly supported, so that if something gives, you step back instead of falling. NEVER load-test a new anchor by jumping into it.
Common anchoring mistakes
- ❌ Door opening toward the trainee. Number one on the list for a reason. The door must close into the frame under load.
- ❌ Sawing the strap over a hard edge. Repeated back-and-forth motion across a beam corner grinds through the webbing. If yellow nylon starts showing through the black stabilizing loop, retire the straps.
- ❌ Trusting drywall. A plastic anchor in plasterboard will hold a picture frame. It will not hold you doing a jump squat.
- ❌ Anchor too low or too high. Below 7 feet (2.1 m) the straps are too long for the standard settings; above 9 feet (2.7 m) without an Xtender the handles end up too high to use.
- ❌ Clipping the carabiner straight onto bare steel. Use the anchor carabiner supplied with your trainer as the connection point.
- ❌ Training in socks on a hardwood floor. Not an anchoring mistake exactly, but it is where most home TRX injuries actually come from.
Your pre-workout check — twenty seconds, every time
| Check | What you are looking for |
|---|---|
| Anchor point | Solid, no movement, no cracks, no rust |
| Contact surface | No sharp edges touching the webbing |
| Door, if used | Closed, locked, opening away from you |
| Carabiner | Fully seated and closed, gate not fouled |
| Webbing and cradles | No fraying or cuts, no yellow showing through the black loop |
| Adjustment buckles | Both straps set to the same length, cam locked |
| Floor | Clear, dry, 8 by 6 feet of space |
| Load test | Static lean, then one slow rep |
Replace your straps if the yellow inner nylon is visible through the stabilizing loop. That is the manufacturer’s own retirement signal, and it is not a suggestion.
Which anchor should you actually buy?
Check your bag first — your trainer already came with anchors. The Home2 includes a door anchor and a suspension anchor; the Pro4 and Tactical add an Xtender. Buy extra only when you have a reason: an X-Mount if you train in one place most days, a hinge anchor if you rent, an Invizi-Mount if your living room doubles as your gym, an Xtender for high ceilings and outdoor training.
Gear I actually use
on any TRX® order — use this code at checkout
TRX15LUKASApplies to all TRX products — suspension trainers, training tools, apparel, education and apps.
Swipe or scroll sideways for more picks →
TRX® HOME2 SYSTEM
The all-rounder for training at home
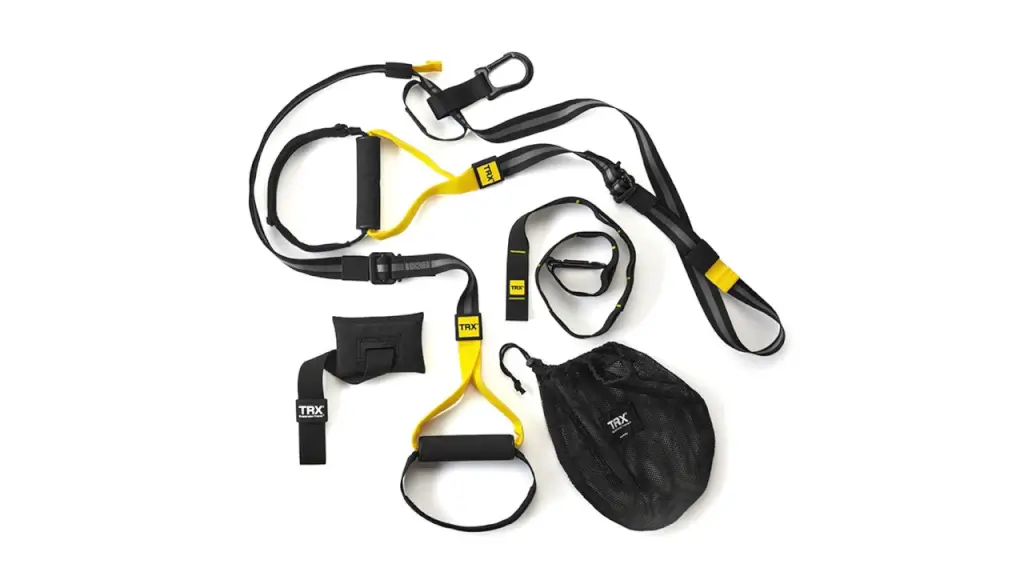
- ✓Door anchor, suspension anchor & mesh bag included
- ✓Free 30-day trial of the TRX App
- ✓Sets up anywhere in seconds, no tools needed
TRX® PRO4 SYSTEM
Built for heavy use and for trainers
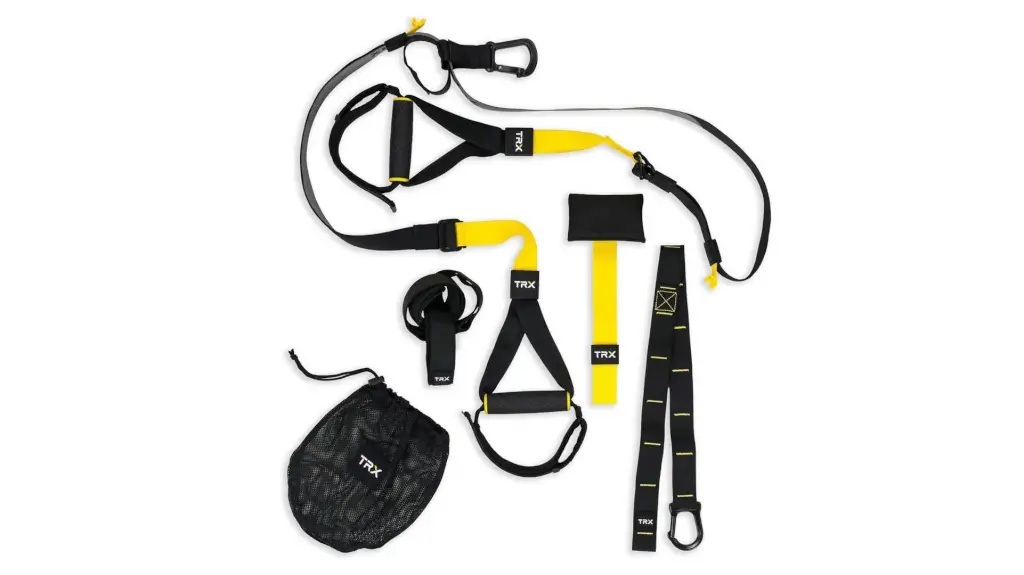
- ✓Door anchor, suspension anchor, Xtender & bag
- ✓Locking carabiner for a secure anchor point
- ✓Rubber handles that resist sweat and friction
TRX App™ Programs
If you have the straps but not a plan
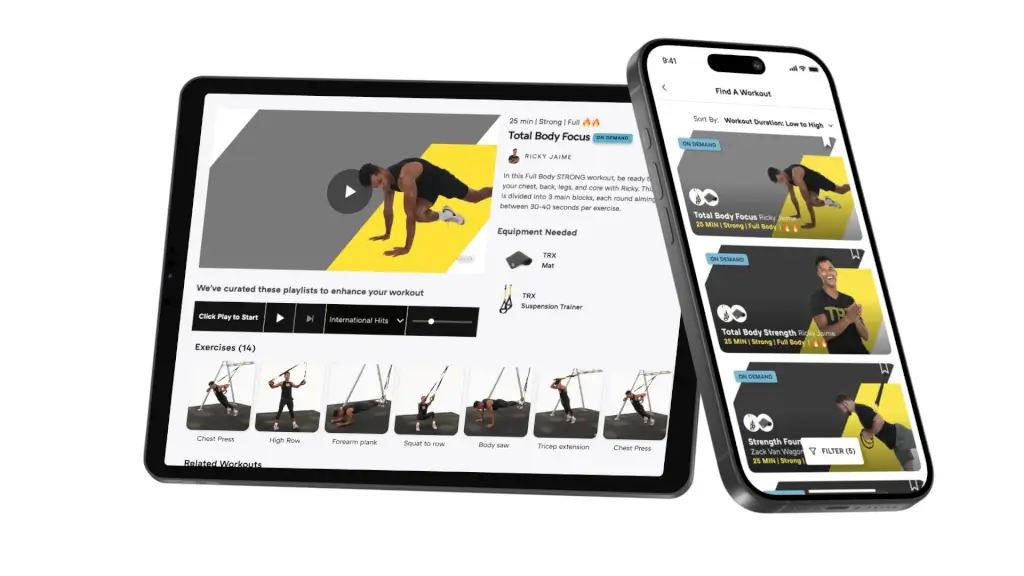
- ✓10+ structured on-demand training programs
- ✓Free 30-day trial, cancel any time
- ✓HSA/FSA eligible
YBell®
Four tools in one, for small spaces
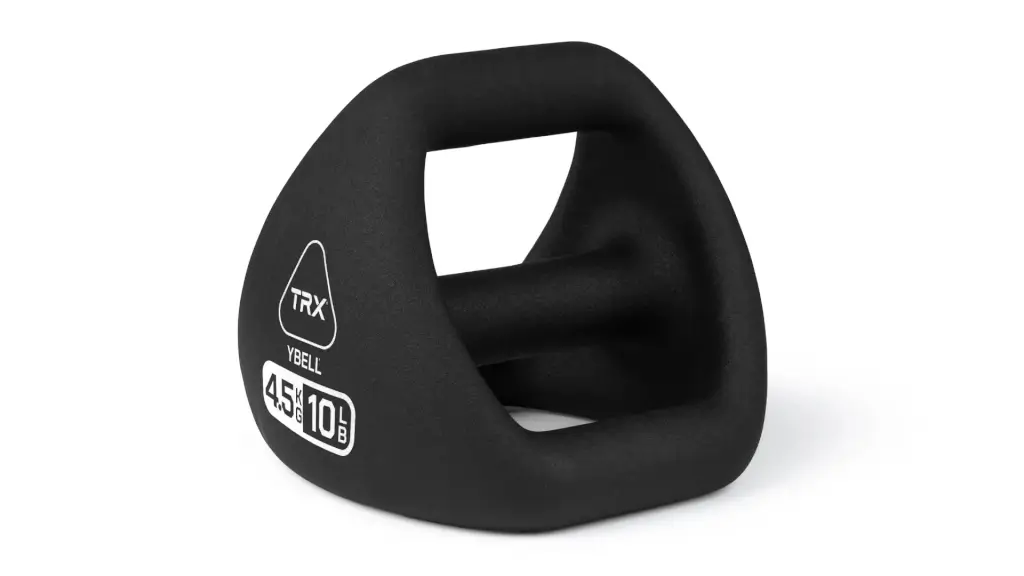
- ✓Dumbbell, kettlebell, med ball and push-up stand
- ✓Neo Series: 2.4–27 lbs (1.1–12 kg)
- ✓Pro Series: 10–44 lbs (4.5–20 kg), 2-year warranty
TRX® RIP TRAINER™
For rotational power and a stronger core
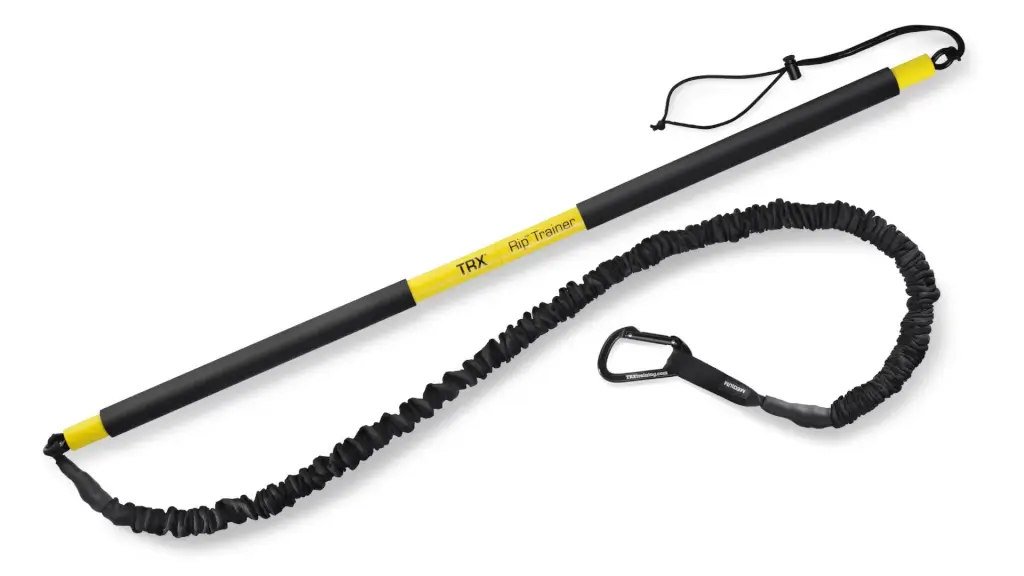
- ✓Door anchor, resistance cord & safety strap included
- ✓Built for rotation — golf, tennis, baseball
- ✓Packs into a backpack, set up in seconds
Disclosure: the links above are affiliate links. If you buy through them, I may earn a commission at no extra cost to you — and you still get 15% off with code TRX15LUKAS. I only recommend gear I actually use. Prices and availability are shown on trxtraining.com and can change.
💡 And if you are still training on counterfeit straps, replace the trainer before you spend a cent on mounts. No anchor fixes bad webbing.
🎁 Everything on that list is covered by the same discount. Use code TRX15LUKAS at checkout for 15% off any order at TRX Training — suspension trainers, mounting hardware, apparel, education and app subscriptions included. Here is how to apply the TRX discount code, step by step.

Now go use it
An anchor point you never train on is just a hook. Once your setup passes the load test, get straight into a session.
Try the 30-minute full-body TRX workout first — it covers every foundational movement pattern, so it doubles as a stress test for your new anchor. There is a free printable PDF version you can tape to the wall next to your straps. And if you want the method rather than just workouts, the TRX education courses teach the anchoring and progression rules properly.